

How to Connect a Domain Name to Hostinger Hosting (2026 Guide)
August 2, 2026 | by anisurrahaman235f@gmail.com
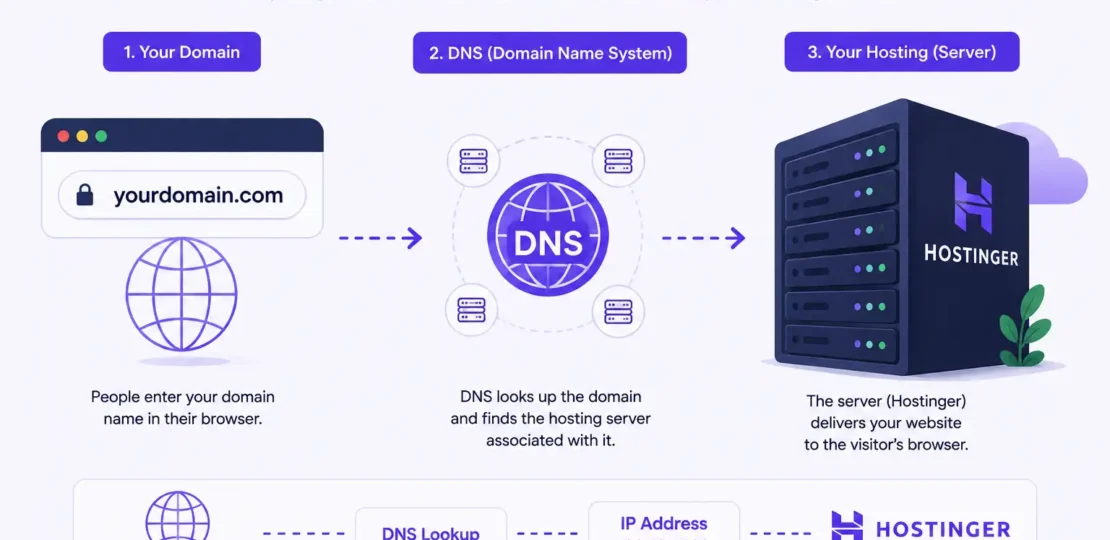
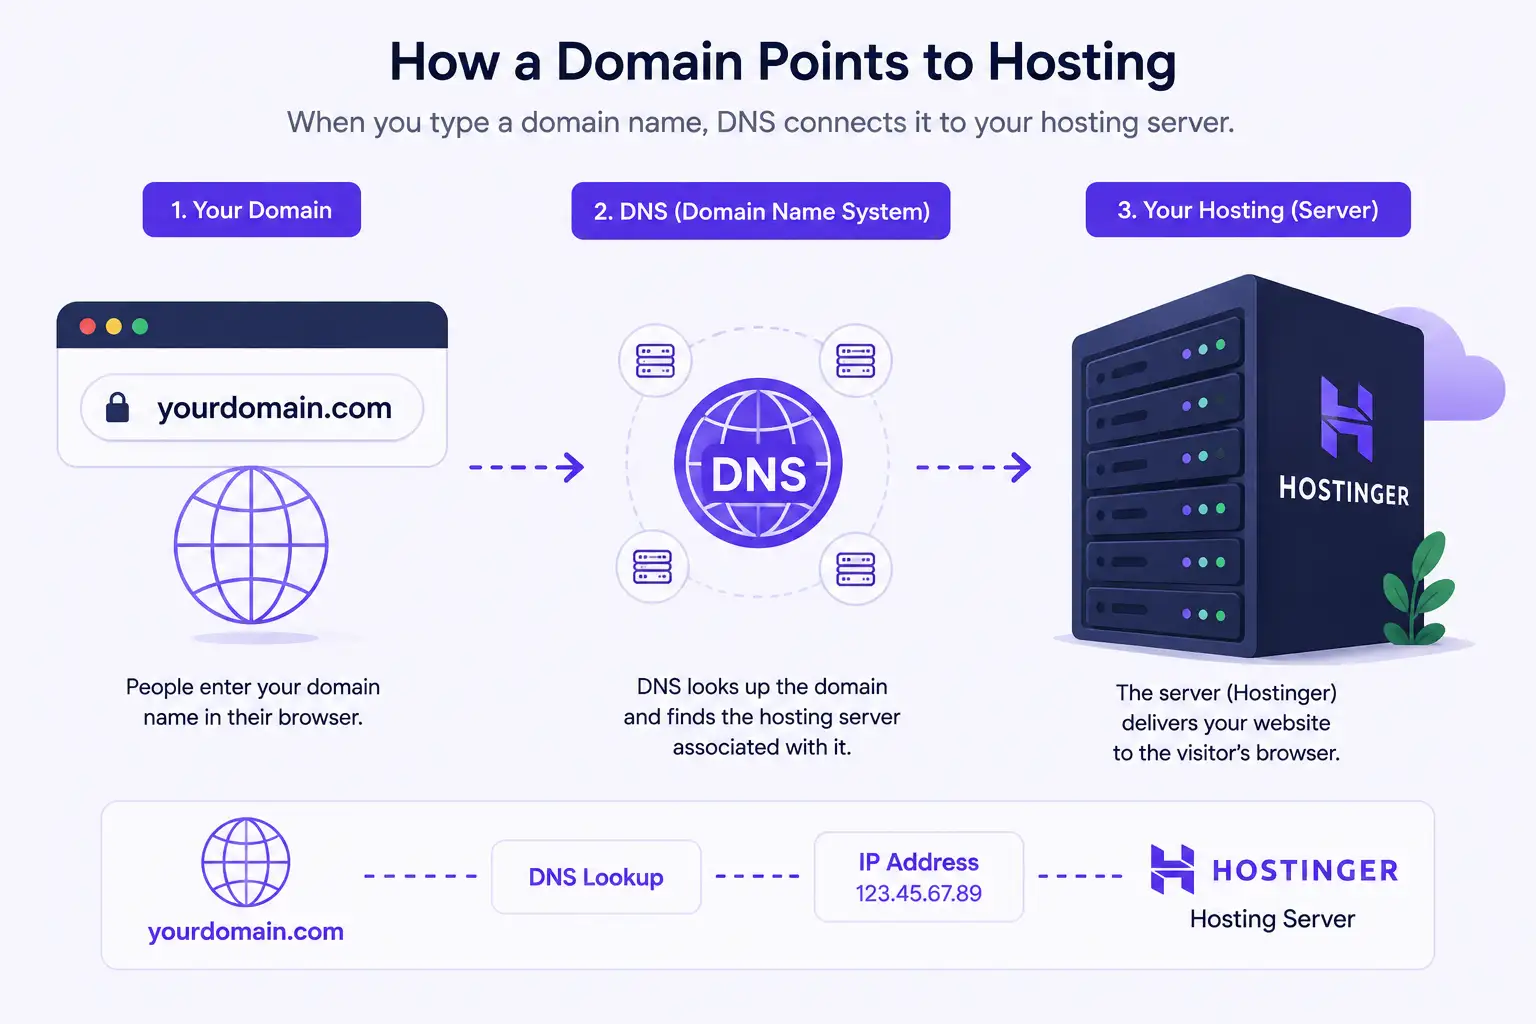
Buying hosting and buying a domain name are two separate purchases, and the internet doesn’t automatically know they belong together. Somewhere in between, you need to tell the wider web: “when someone types this domain, send them to this server.” That instruction happens through DNS, and Hostinger gives you two different ways to set it up — each with different tradeoffs depending on your situation.
This guide walks through both methods step by step, explains which one actually fits your setup, and covers the propagation waiting game and troubleshooting steps that most tutorials skip over.
The Two Ways to Connect a Domain to Hostinger
Before touching any settings, it’s worth understanding what you’re actually choosing between, because picking the wrong one for your situation can cause avoidable headaches.
Method 1: Changing Nameservers. This hands over full DNS control to Hostinger. Think of nameservers as the domain’s GPS — once changed, every type of record (A, MX, TXT, CNAME) gets managed from Hostinger’s side, and Hostinger typically configures the rest automatically once the change takes effect.
Method 2: Updating an A Record. This is a narrower, more surgical change. Instead of moving all DNS authority, you only update the specific record that tells web traffic where to go, while everything else — like email routing through Google Workspace, or DNS managed through Cloudflare — stays exactly where it is.
The general rule: if you don’t have existing email service, Cloudflare proxying, or other custom DNS records tied to your domain, use the nameserver method. It’s simpler, and Hostinger will configure supporting records for you. If you have any of those things already set up and don’t want to reconfigure them from scratch, the A record method preserves them while just redirecting your site traffic.
Method 1: Connecting via Nameservers (Recommended for Most Users)
This is the path Hostinger itself recommends for the majority of setups, and it’s the one to use if this is a fresh domain with no existing email or third-party DNS configuration attached to it.
Step 1: Find Your Hostinger Nameservers
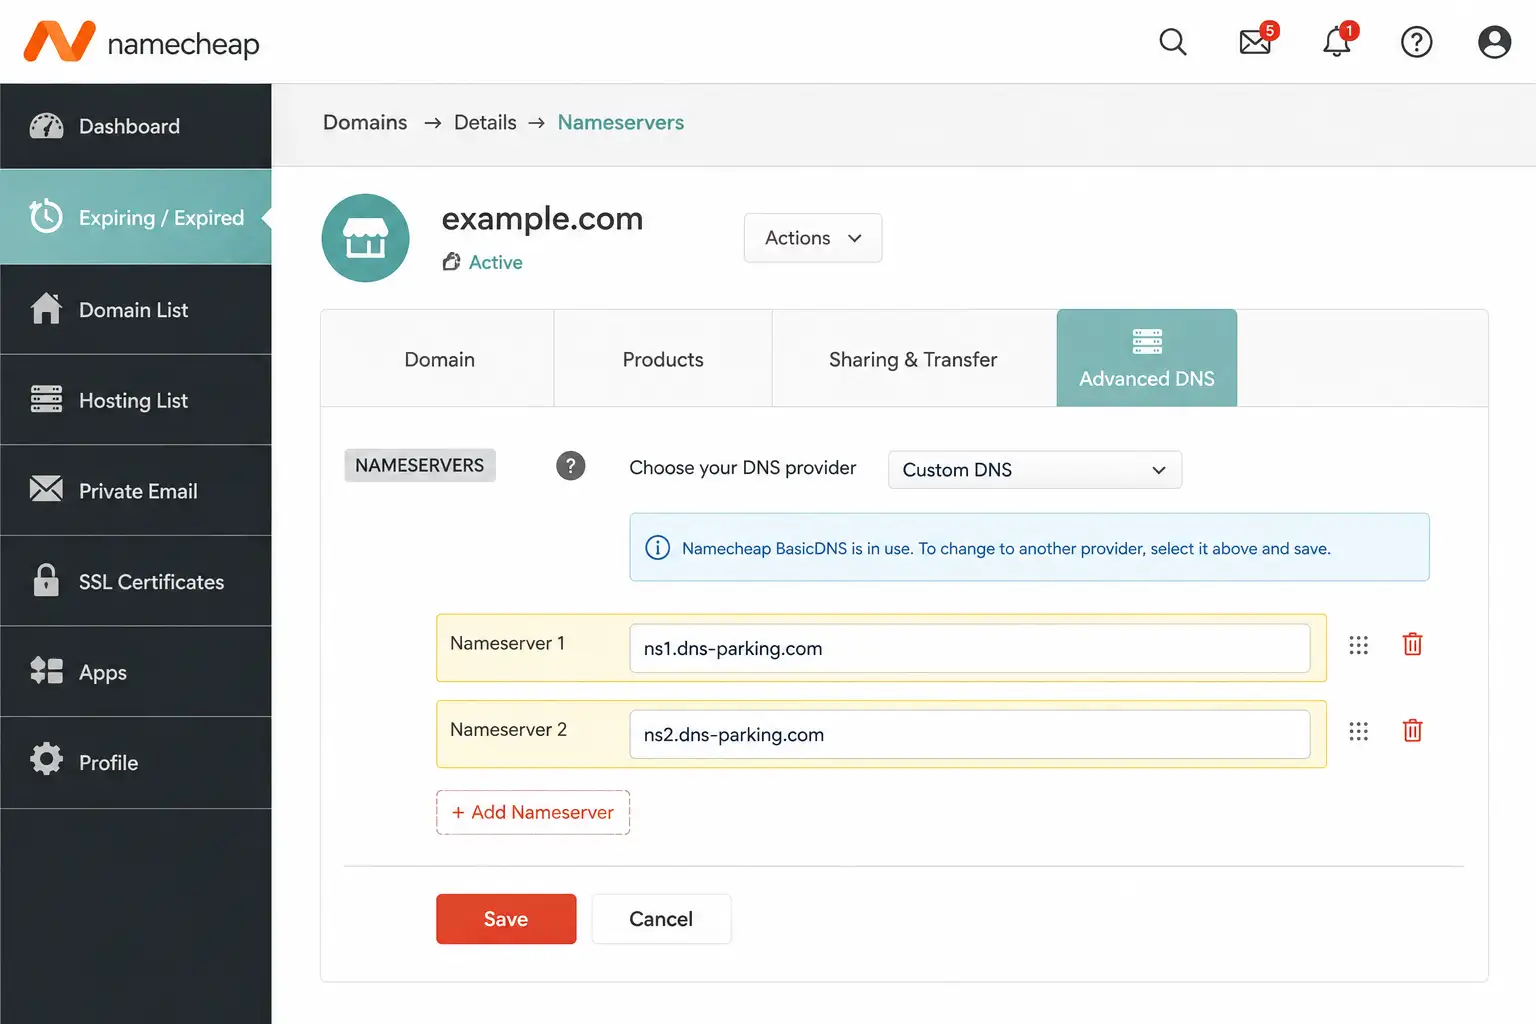
Log in to hPanel and go to the Domains section. Select the domain you’re connecting, then look for the nameservers listed there. Hostinger typically provides two nameserver addresses — copy both exactly as shown, since these values can vary slightly between accounts and domains.
Step 2: Log In to Your Domain Registrar
If your domain was purchased somewhere other than Hostinger (Namecheap, GoDaddy, Google Domains, and similar registrars are common), log in to that account separately. This step happens entirely outside of hPanel.
Step 3: Locate the Nameserver Settings
Every registrar labels this slightly differently, but you’re generally looking for a section called DNS Management, Nameservers, or Name Server Settings attached to your specific domain.
Step 4: Replace the Existing Nameservers
Remove whatever nameservers are currently listed and paste in the two Hostinger nameserver values you copied earlier. Save the change.
Step 5: Confirm the Update in hPanel
Some Hostinger setups include a “I’ve Updated NS/DNS” confirmation button back in hPanel. Clicking it lets Hostinger’s system actively check for the change rather than waiting passively, which can slightly speed up how quickly your dashboard reflects the update.
Step 6: Wait for Propagation
DNS changes don’t take effect instantly across the entire internet. Propagation can take anywhere from a few minutes up to 24–48 hours, depending on your registrar and various DNS caching layers along the way. During this window it’s normal for the domain to work correctly for some visitors and not others.
Important side effect: Pointing your domain via nameservers automatically configures email records to use Hostinger Email by default. If you’re using a different email provider — Google Workspace or Outlook, for example — you’ll need to manually update your MX, SPF, DKIM, and DMARC records after propagation to avoid your email going down.
Method 2: Connecting via A Record (For Advanced or Existing Setups)
Choose this method if your domain already has active email service through a third-party provider, uses Cloudflare for proxying or security, or has other custom DNS records you don’t want to disturb.
Step 1: Get Your Hostinger IP Address
In hPanel, go to the DNS section (or the domain’s connection settings) and find the “Connect via DNS record” option. This displays the specific A record IP address your domain needs to point to — copy this value exactly, since it’s unique to your hosting account and shouldn’t be typed from memory or guessed from an old tutorial.
Step 2: Open Your Existing DNS Provider
Unlike the nameserver method, this step happens wherever your domain’s DNS is currently managed — that might be your registrar, or it might be Cloudflare or another third-party DNS host if you’ve already configured one.
Step 3: Locate the DNS Zone Editor or Advanced DNS Section
Look for a section usually labeled Advanced DNS, DNS Zone Editor, or Host Records.
Step 4: Create or Update the A Record
Find (or create) the A record for @ (representing your root domain) and set its value to the IP address you copied from Hostinger. If you also want www.yourdomain.com to work, you’ll typically need a matching CNAME record pointing www to your root domain, or a second A record depending on your provider’s setup.
Step 5: Save and Wait for Propagation
A record changes generally propagate faster than full nameserver changes — often within 30 minutes to a few hours — though it can still take up to 24 hours in some cases.
Important limitation: With this method, your DNS zone stays at the original provider, not Hostinger. That means any future subdomains or DNS changes need to be created and checked at your original DNS provider, not through hPanel — a detail that trips people up if they forget which side is actually controlling DNS after switching methods.
A Special Case: Hostinger Website Builder
If you’re using Hostinger Website Builder specifically rather than standard hosting, note that A records are not supported for this product — using one will cause the site not to load. Website Builder requires either the nameserver method, or specifically CNAME records rather than A records if you want to keep DNS management elsewhere. If you go the CNAME route, make sure to remove any existing A or AAAA records for the root domain first, since leaving them in place alongside a CNAME record causes conflicts.
How to Check If Your Domain Has Propagated
Rather than refreshing your browser anxiously every ten minutes, use a DNS propagation checker tool, which shows how your domain resolves across DNS servers in different regions worldwide simultaneously. If most locations show the updated record but a few still show the old one, that’s completely normal during the propagation window and will resolve on its own.
Clearing your local browser cache or testing in an incognito/private window can also help you see the updated site sooner, since your own device may be caching the old DNS response longer than the rest of the internet.
Common Problems and How to Fix Them
The domain shows a Hostinger error page or default placeholder instead of your site. This usually means DNS has propagated but no website is actually connected yet in hPanel — go to the Websites section and confirm your domain is attached to an active site, not just pointed at the server generally.
Email stopped working after switching nameservers. This is the most common mistake with the nameserver method. Check your MX records in hPanel’s DNS Zone Editor and update them to match whichever email provider you’re actually using, since the nameserver switch resets email routing to Hostinger’s defaults unless you intervene.
The site loads for some visitors but not others. This is standard mid-propagation behavior, not a configuration error. Give it the full 24–48 hour window before troubleshooting further.
Mixing both methods halfway through. Don’t start with nameservers and then also try adding A records at your registrar, or vice versa — pick one method and stick with it, since combining them creates an inconsistent state that’s genuinely harder to diagnose than either method alone.
Cloudflare-proxied domains showing certificate errors. If your domain sits behind Cloudflare, make sure Cloudflare’s proxy status and SSL mode are configured correctly alongside your A record change, since a mismatch between Cloudflare’s SSL settings and Hostinger’s SSL certificate is a common source of browser security warnings after switching hosts.
Final Thoughts
For the overwhelming majority of people setting up a new site with no existing email or complex DNS configuration, changing nameservers is the simpler, more reliable path — Hostinger handles the supporting records automatically, and you get centralized management through hPanel going forward. Reach for the A record method specifically when you have something worth preserving elsewhere, like an existing Google Workspace inbox or a Cloudflare setup you don’t want to rebuild. Whichever method you choose, give propagation the full window before assuming something’s broken, and double-check your email records afterward if email continuity matters to you.
RELATED POSTS
View all

Best Cheap Hosting Providers Compared (2026): What “Cheap” Actually Costs
August 2, 2026 | by anisurrahaman235f@gmail.com
Common WordPress Errors and How to Fix Them (2026)
August 2, 2026 | by anisurrahaman235f@gmail.com

How Much Does It Cost to Start a Website in 2026?
August 2, 2026 | by anisurrahaman235f@gmail.com